Mastering the Art of Long Exposure Photography takes skill, patience, and an eye for detail. In this article, we will explore the techniques and tips to capture stunning photographs using long exposure, allowing you to create captivating images with the magic of time and light.
Understanding Shutter Speed and its Effects
In the world of photography, mastering the art of long exposure photography requires a thorough understanding of shutter speed and its effects. Shutter speed refers to the length of time the camera’s shutter remains open when capturing a photo. It plays a crucial role in determining the amount of light entering the camera, as well as the overall look and feel of the image.
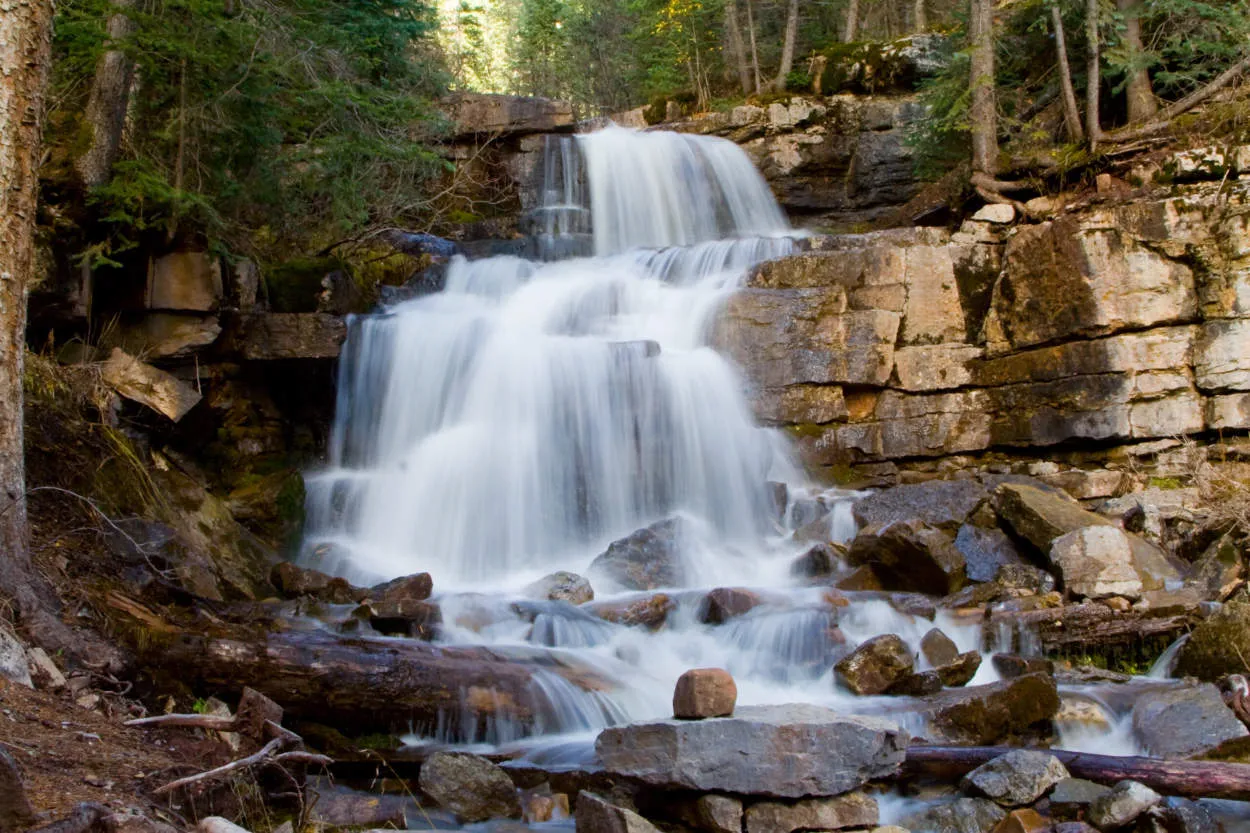
When working with long exposure photography, a slow shutter speed is typically used. This allows the camera to capture motion over an extended period, creating stunning effects such as light trails, smooth waterfalls, or starry nightscapes.
On the other hand, a fast shutter speed is used to freeze motion and capture crisp, sharp images. This is ideal for capturing fast-moving subjects like sports, wildlife, or action scenes.
Experimenting with different shutter speeds allows photographers to unleash their creativity and achieve various effects. It’s important to note that selecting the appropriate shutter speed depends on factors such as available light, desired outcome, and the presence of a tripod for stability.
Understanding how shutter speed affects your photos is crucial for mastering long exposure photography. By grasping this concept, you can take full control over your camera’s settings, unlock endless creative possibilities, and capture breathtaking images.
Choosing the Ideal Time and Location
In the world of long exposure photography, capturing stunning images often relies on choosing the perfect time and location. This article will guide you on how to master the art of long exposure photography by selecting the ideal time and location for your shots.
1. Golden Hour: One of the best times to shoot long exposure photos is during the golden hour, which happens shortly after sunrise or before sunset. During this time, the soft and warm light creates a magical atmosphere, adding a touch of beauty to your images.
2. Nighttime: If you’re aiming for capturing mesmerizing nightscapes or star trails, nighttime is your go-to time. Darkness allows you to experiment with longer exposures, revealing the hidden beauty of the night sky.
3. Weather Conditions: Keep an eye on the weather forecast. Cloudy or foggy days can add drama and mystery to your long exposure shots. Experiment with different weather conditions to capture unique and atmospheric images.
4. Interesting Locations: Find unique and captivating locations that will enhance the overall impact of your long exposure photographs. Look for elements such as flowing water, cityscapes, or iconic landmarks, which can add depth and interest to your shots.
5. Experiment and Plan: Don’t be afraid to experiment with different times and locations. Visit your chosen location before the shoot and scout for potential compositions. Plan your shoot meticulously, taking into consideration factors like tide levels, moon phases, and light direction to maximize your chances of capturing breathtaking long exposure photos.
Remember, mastering the art of long exposure photography requires patience, practice, and careful consideration of the time and location. So grab your camera, explore various settings, and let your creativity flow to capture stunning long exposure images.
Capturing Motion blur with Long Exposures
In the world of photography, mastering the art of long exposure photography opens up a whole new realm of creative possibilities. One fascinating aspect of this technique is the ability to capture motion blur in your images.
By using long exposures, you can intentionally blur moving subjects while keeping stationary objects sharp. This creates a sense of movement and adds a dynamic element to your photos. Whether you’re photographing a bustling cityscape, flowing water, or even a moving car, long exposures allow you to convey motion like never before.
To achieve motion blur with long exposures, it’s important to have a sturdy tripod to keep your camera steady. Set your camera to a slow shutter speed, typically ranging from a few seconds to several minutes, depending on the desired effect. You may also need to use neutral density filters to reduce the amount of light entering the lens, enabling longer exposures in bright conditions.
Experiment with different shutter speeds to find the right balance between capturing movement and maintaining detail. Remember, the longer the exposure, the more pronounced the motion blur will be. Patience and practice are key when it comes to mastering this technique.
It’s worth mentioning that long exposure photography not only allows you to capture motion blur but also enables stunning light trails, starry skies, and ethereal effects with fireworks or light painting. The possibilities are endless!
So, grab your camera, tripod, and start exploring the art of long exposure photography. With careful planning and creativity, you can capture mesmerizing images that truly depict the beauty of motion.
Creating Light Trails with Slow Shutter Speeds
Long exposure photography is a fascinating technique that allows photographers to capture the movement and flow of time in a single frame. One of the most captivating effects of long exposure photography is the creation of light trails.
Light trails are streaks of light that are captured when a camera’s shutter is left open for an extended period of time, allowing moving objects to create a trail of light. This technique can be used to capture the trails of car lights on a busy street, the movement of stars in the night sky, or even the flow of waterfalls.
To create light trails, you need to set your camera’s shutter speed to a slow setting, typically around a few seconds or more. This allows enough time for the moving lights to create a trail on the image sensor. It’s also important to use a tripod or stabilize your camera to avoid any unwanted camera shake.
It’s recommended to shoot in low-light conditions or during the blue hour, which is the period of twilight before sunrise or after sunset. This allows for better contrast between the light trails and the dark surroundings.
Experiment with different subjects and light sources to create unique and captivating light trails. Find a location with interesting traffic patterns, water sources, or city lights. Remember that the longer the exposure, the longer and more prominent the light trails will be.
Mastering the art of long exposure photography and creating light trails requires practice and experimentation. So, grab your camera, set it to a slow shutter speed, and let your creativity flow as you capture mesmerizing light trails that add a dynamic and captivating element to your photographs.
Conclusion
In conclusion, mastering the art of long exposure photography requires a combination of technical skills and artistic vision. By understanding the fundamentals of exposure, using the right equipment, and experimenting with different techniques, photographers can create stunning images that capture the passage of time in a unique and captivating way.


