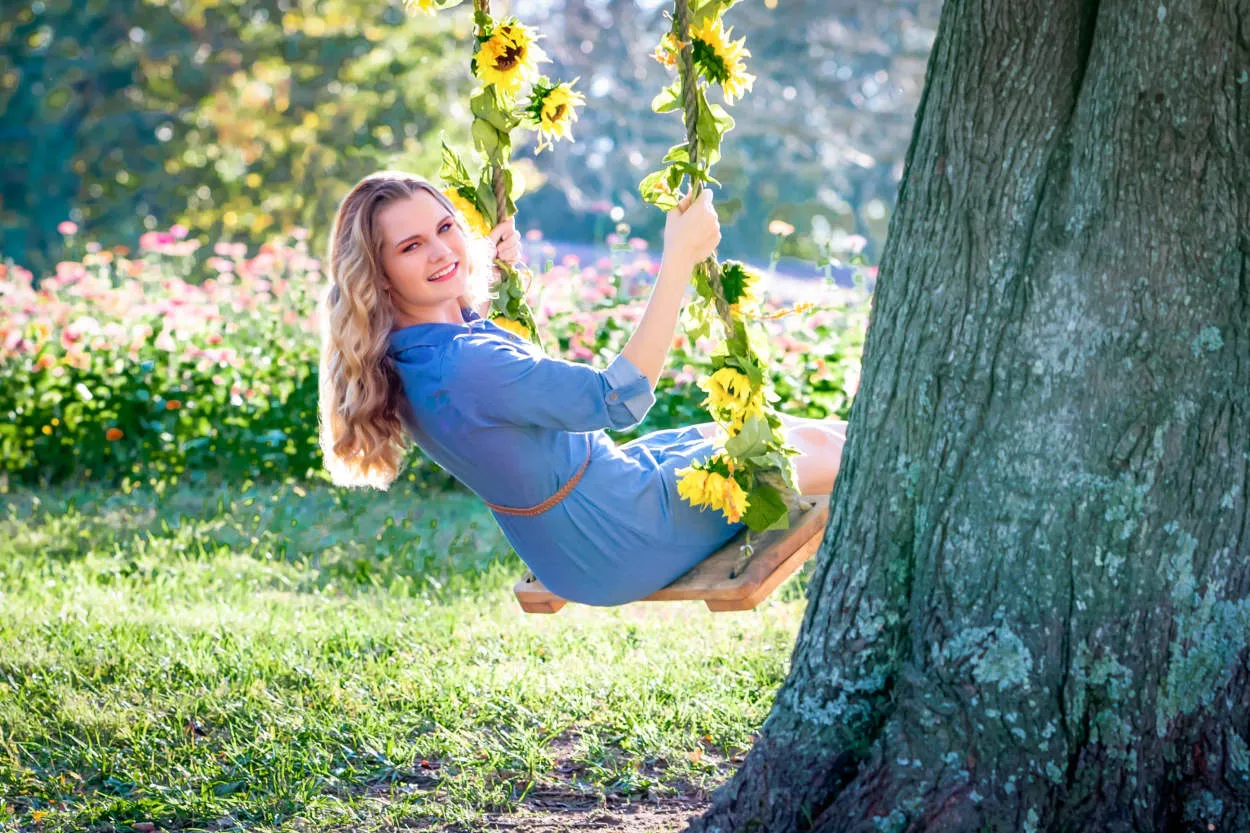
Discover the secrets to capturing breathtaking golden hour shots with these invaluable tips and tricks. Whether you’re a professional photographer or just a hobbyist, this article will guide you through the best techniques for maximizing the beautiful warm light of the golden hour. Learn how to create stunning imagery and make your photos truly shine!
Understanding the Golden Hour and Its Impact on Photography
The Secrets of Capturing Perfect Golden Hour Shots
The golden hour, also known as the magic hour, is a period shortly after sunrise or before sunset. During this time, the natural light is warm, soft, and diffused, creating a magical and captivating atmosphere in photographs.
Understanding the golden hour and its impact on photography is essential for photographers who want to capture stunning images. Here are some key points to consider:
-
The Quality of Light
During the golden hour, the sun is positioned low in the sky, creating a soft, golden light that flatters and enhances the subject. Compared to the harsh midday sun, this gentle light adds warmth, depth, and dimension to the images, resulting in a more pleasing aesthetic.
-
The Colors
One of the most striking features of the golden hour is its warm, golden tones. The low angle of the sun during this time creates a beautiful glow that bathes the scene in breathtaking hues. The colors become more vibrant and saturated, adding an enchanting atmosphere to the photographs.
-
The Shadows and Silhouettes
As the sun’s position changes during the golden hour, it creates longer shadows that add depth and drama to the composition. These elongated shadows can be creatively incorporated into the shot, creating interesting patterns and silhouettes that enhance the visual impact of the image.
-
The Mood and Emotion
The golden hour has a magical and romantic quality that evokes feelings of warmth, tranquility, and nostalgia. Photographs taken during this time often have a dreamy and ethereal feel to them, capturing the true essence and mood of the moment.
Mastering the techniques and nuances of shooting during the golden hour can elevate your photography to the next level. It requires careful planning, patience, and an understanding of how light interacts with your subject. Embrace this magical time of day and unleash your creativity to capture the perfect golden hour shots.
Mastering the Use of Natural Light during the Golden Hour
The Golden Hour, also known as the magic hour, is a key time for photographers to capture stunning shots with a warm and soft glow. This time period occurs twice a day, just after sunrise and just before sunset, when the sun is low in the sky.
Here are some tips to master the use of natural light during the Golden Hour:
- Plan ahead: Check the weather forecast and find the exact time of sunrise or sunset. Arrive early to set up your shot.
- Choose the right location: Look for areas with interesting backgrounds and elements that will enhance your composition. Consider the direction of the light and how it will interact with your subject.
- Utilize soft, warm light: During the Golden Hour, the quality of light is softer and diffused, which creates a more flattering and pleasing effect on your subject. Experiment with different angles and positions to take full advantage of this beautiful light.
- Play with shadows and highlights: The low-angle light during this time can create long shadows and interesting patterns. Use these elements to add depth and dimension to your photos.
- Adjust your white balance: Take advantage of the warm tones during the Golden Hour by adjusting your camera’s white balance settings. This will enhance the golden hues and make your photos even more captivating.
- Don’t forget to experiment: Capture different perspectives, try out different techniques, and be open to unexpected opportunities. The Golden Hour provides a magical canvas for creativity.
By mastering the use of natural light during the Golden Hour, you can create breathtaking photos that stand out from the crowd. With practice and experimentation, you can take your photography skills to the next level and capture perfect Golden Hour shots.
Choosing the Right Camera Settings for Golden Hour Photography
The secret to capturing perfect golden hour shots lies not only in the beauty of the natural light but also in the right camera settings. Here are some essential tips to help you make the most of this magical time of day:
1. Use a wide aperture
When shooting during the golden hour, make sure to use a wide aperture (a low f-stop number) to create a shallow depth of field. This will help you isolate your subject and achieve a dreamy, blurred background.
2. Adjust the white balance
To enhance the warm and golden tones of the golden hour, manually adjust the white balance setting on your camera. Experiment with different temperature settings until you achieve the desired effect.
3. Shoot in RAW format
To have more flexibility in post-processing, it is recommended to shoot in RAW format. RAW files retain more data and allow you to make adjustments to exposure, white balance, and other settings without losing image quality.
4. Set the ISO carefully
During the golden hour, the lighting conditions are usually soft and gentle. Start with a low ISO setting (e.g., ISO 100) and gradually increase if needed. Avoid using high ISO values to prevent introducing digital noise to your images.
5. Use spot metering
To maintain accurate exposure in challenging lighting situations, switch your camera’s metering mode to spot metering. This will ensure that your subject is well-exposed, even with a bright sky in the background.
6. Consider using a tripod
As the light tends to be softer and dimmer during the golden hour, using a tripod can help prevent camera shake and ensure sharper images. It also allows you to experiment with longer exposures for creative effects, such as capturing smooth water or light trails.
7. Don’t forget to experiment
While these settings serve as a starting point, don’t be afraid to experiment and let your creativity guide you. Embrace the magical light of the golden hour and explore different camera settings to capture unique and breathtaking shots.
Tips and Techniques for Composition during the Golden Hour
The golden hour, also referred to as the magic hour, is a time of the day favored by photographers for its stunning lighting conditions. It occurs during the first hour after sunrise and the last hour before sunset. To capture perfect golden hour shots, here are some tips and techniques to consider:
1. Plan Ahead
Research the exact time of sunrise or sunset in your location and plan your shoot accordingly. Being well-prepared ensures you don’t miss out on this magical lighting.
2. Arrive Early
Reach your chosen location well in advance to set up your equipment and find the ideal composition. Take some time to explore the area and identify potential subjects or scenes.
3. Use a Tripod
The low light conditions during the golden hour often require longer exposure times. Using a sturdy tripod will help eliminate camera shake and ensure sharp images.
4. Experiment with Perspective
Try different angles and perspectives to capture unique and visually interesting shots. Play with low angles, silhouettes, or incorporate the warm golden light as a backdrop.
5. Utilize the Rule of Thirds
Compose your shots using the rule of thirds to create a balanced and visually appealing image. Position key elements of interest along the gridlines or at their intersections.
6. Incorporate Foreground Elements
Add depth and interest to your images by including foreground elements such as trees, rocks, or other objects. This technique can enhance the overall composition and create a sense of scale.
7. Experiment with Exposure
Explore different exposure settings to capture the desired mood and atmosphere. You can underexpose to create a more dramatic effect or slightly overexpose to enhance the warm tones.
8. Capture the Afterglow
Don’t pack up your gear immediately after the sun sets. Stay a little longer to capture the beautiful hues that appear in the sky during the afterglow. These colors can add a magical touch to your images.
By applying these tips and techniques during the golden hour, you can enhance your photography skills and capture stunning images filled with beautiful light and atmosphere.
Conclusion
In conclusion, capturing perfect golden hour shots requires careful planning and attention to detail. The golden hour provides a unique and magical lighting quality that can enhance your photographs and create stunning visual effects. By understanding the ideal timing, choosing the right location, and employing appropriate techniques, photographers can make the most of this magical hour and capture truly breathtaking images.


